How to develop
Since a module can have PropertyBag to communicate with end-users for parameter adjustment, it is necessary to design PropertyBag first. And then a developer has to link the PropertyBag to the module. Developed modules will be shown on algorithm selection boxes according to their module type.
o General procedure
1. Design a PropertyBag in the 'PropertyBag Editor' window
2. Develop a new module in the 'Module Editor' window
3. Link the PropertyBag to the module in the 'Module Editor' window
4. Visual Gene Developer automatically (or by users) will register the module to a certain target place.
Step 1: Design custom PropertyBag
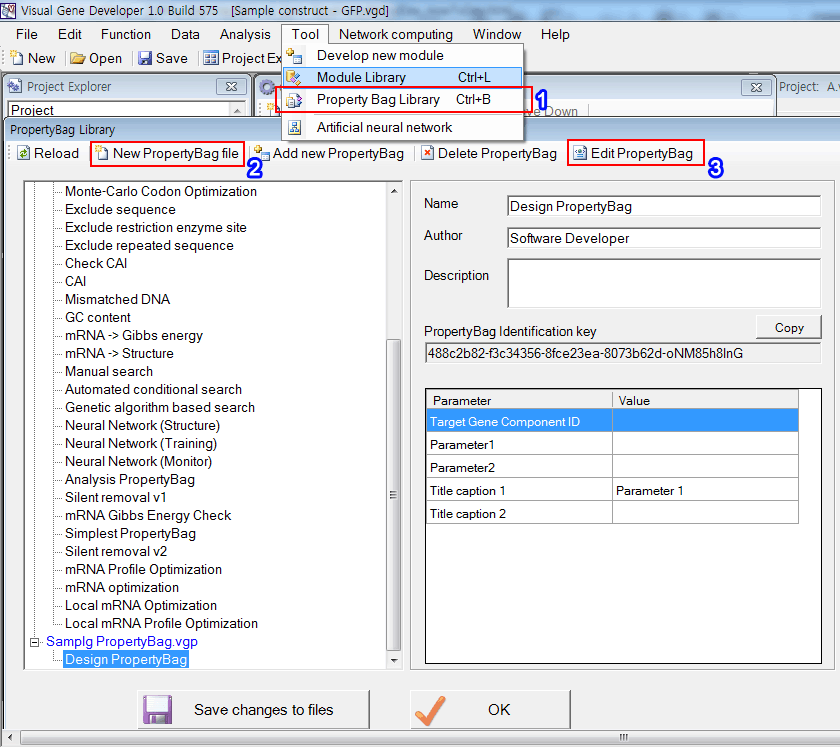
1. Click on the 'Property Bag Library' in the 'Tool' menu
2. Click on the 'New PropertyBag file' button
3. Click on the 'Edit PropertyBag' button
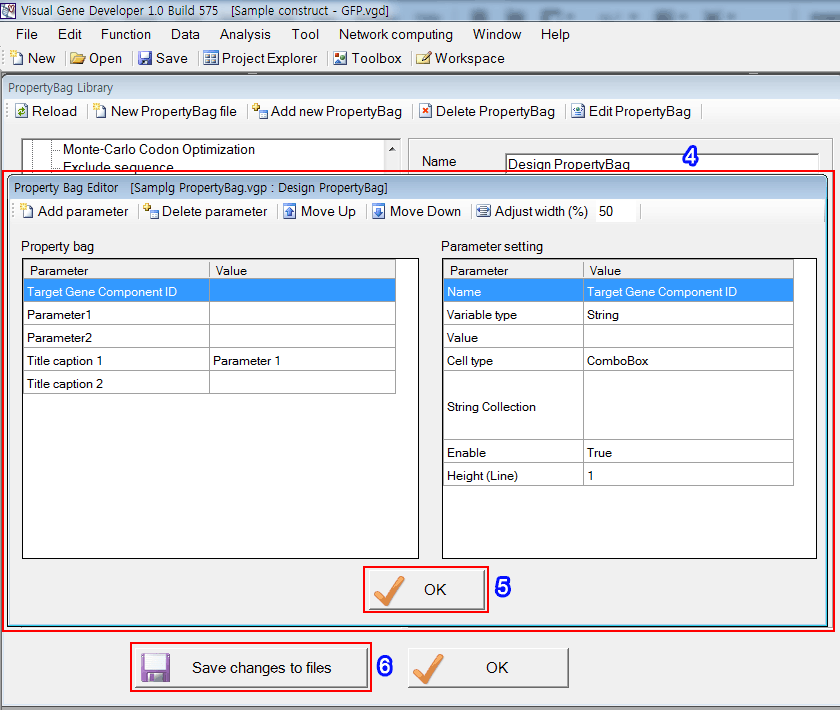
4. Design PropertyBag
5. Click on the 'OK' button
6. Click on the 'Save changes to files' button in the 'PropertyBag Library' window
Step 2: Develop a new module
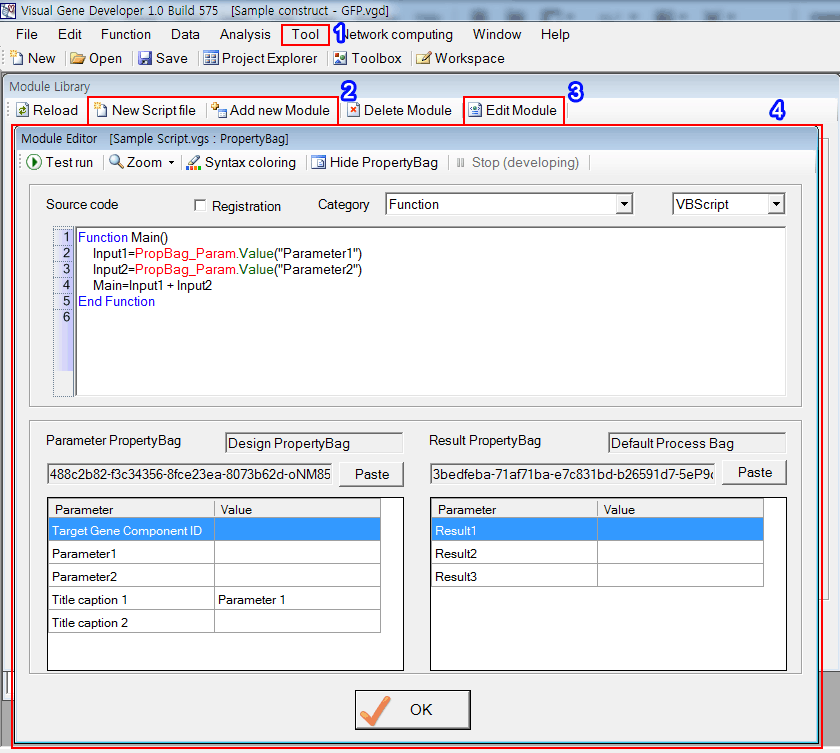
1. Click on the 'Module Library' in the 'Tool' menu
2. Click on the 'New Script file' button or 'Add new Module' button
3. Click on the 'Edit Module' button
4. Develop module
Step 3: Link PropertyBag to Module
1. Click on the 'Copy' button in the 'PropertyBag Library' window to copy 'PropertyBag Identification Key' to clipboard
2. Click on the 'Paste' button in the 'Module Editor' window.
3. Immediately, you can see the designed PropertyBag
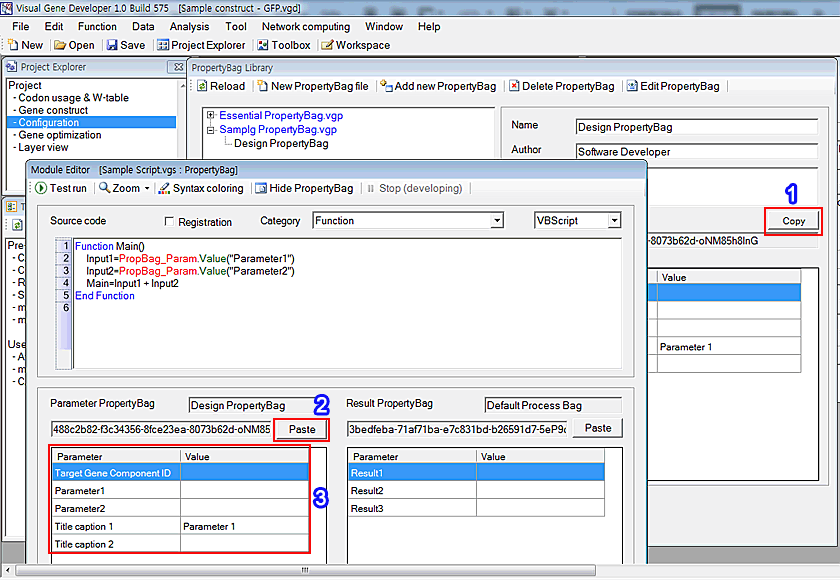
In the source code, 'PropBag_Param.Value(Parameter name here)' retrieves a parameter value from PropertyBag
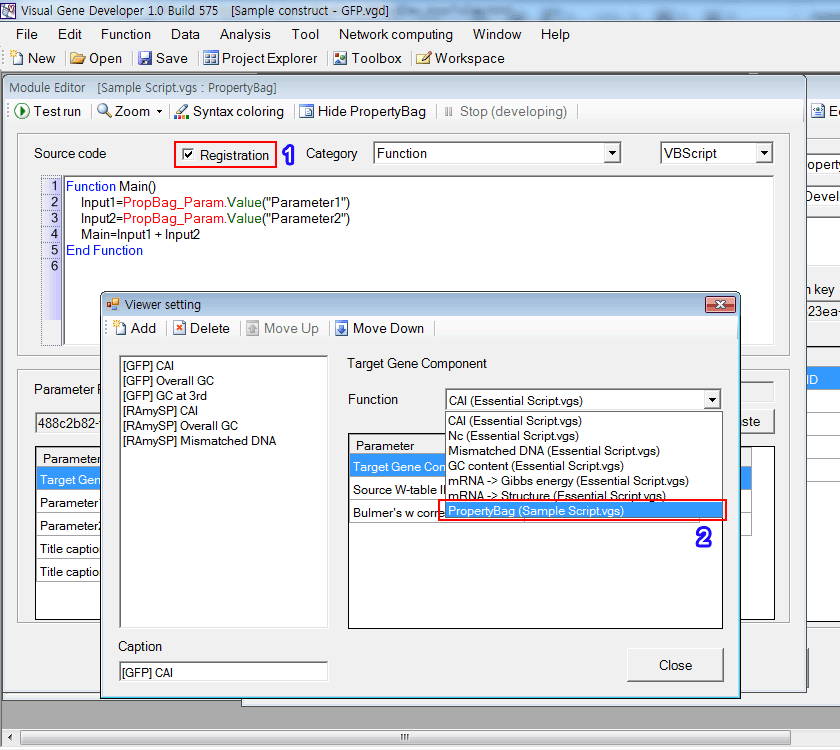
Step 4: Module registration
1. Check on 'Registration'. *Category is important. It determines the location of a developed module.
2. For example, in the case of the 'Function' type, the module name will be shown in the 'Viewer setting' window.
